

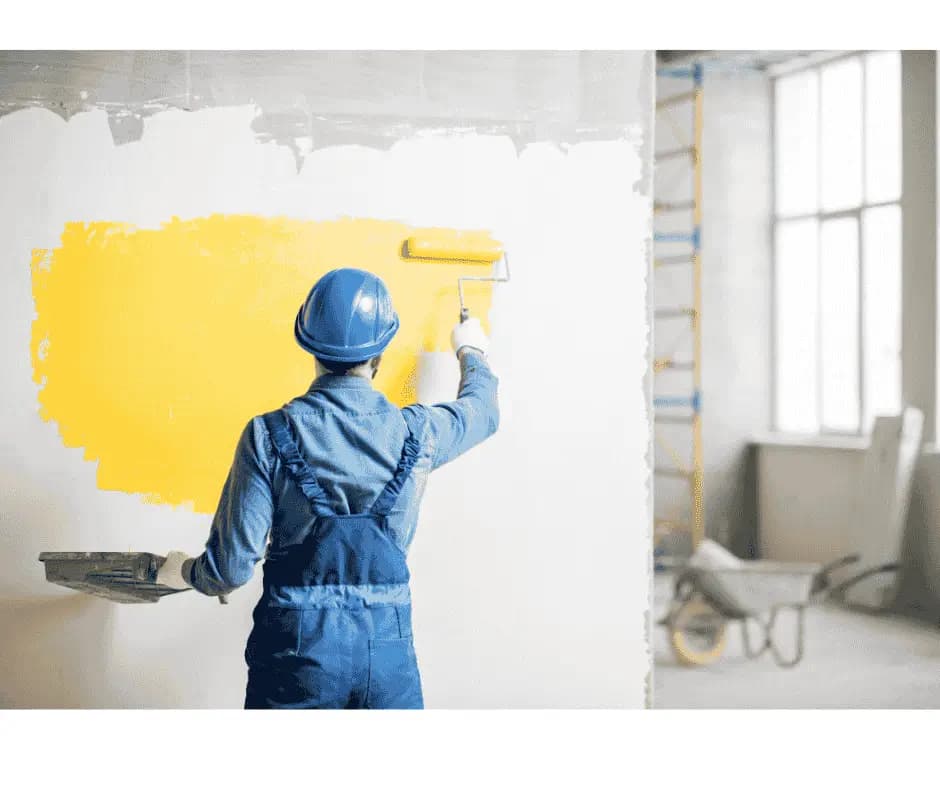
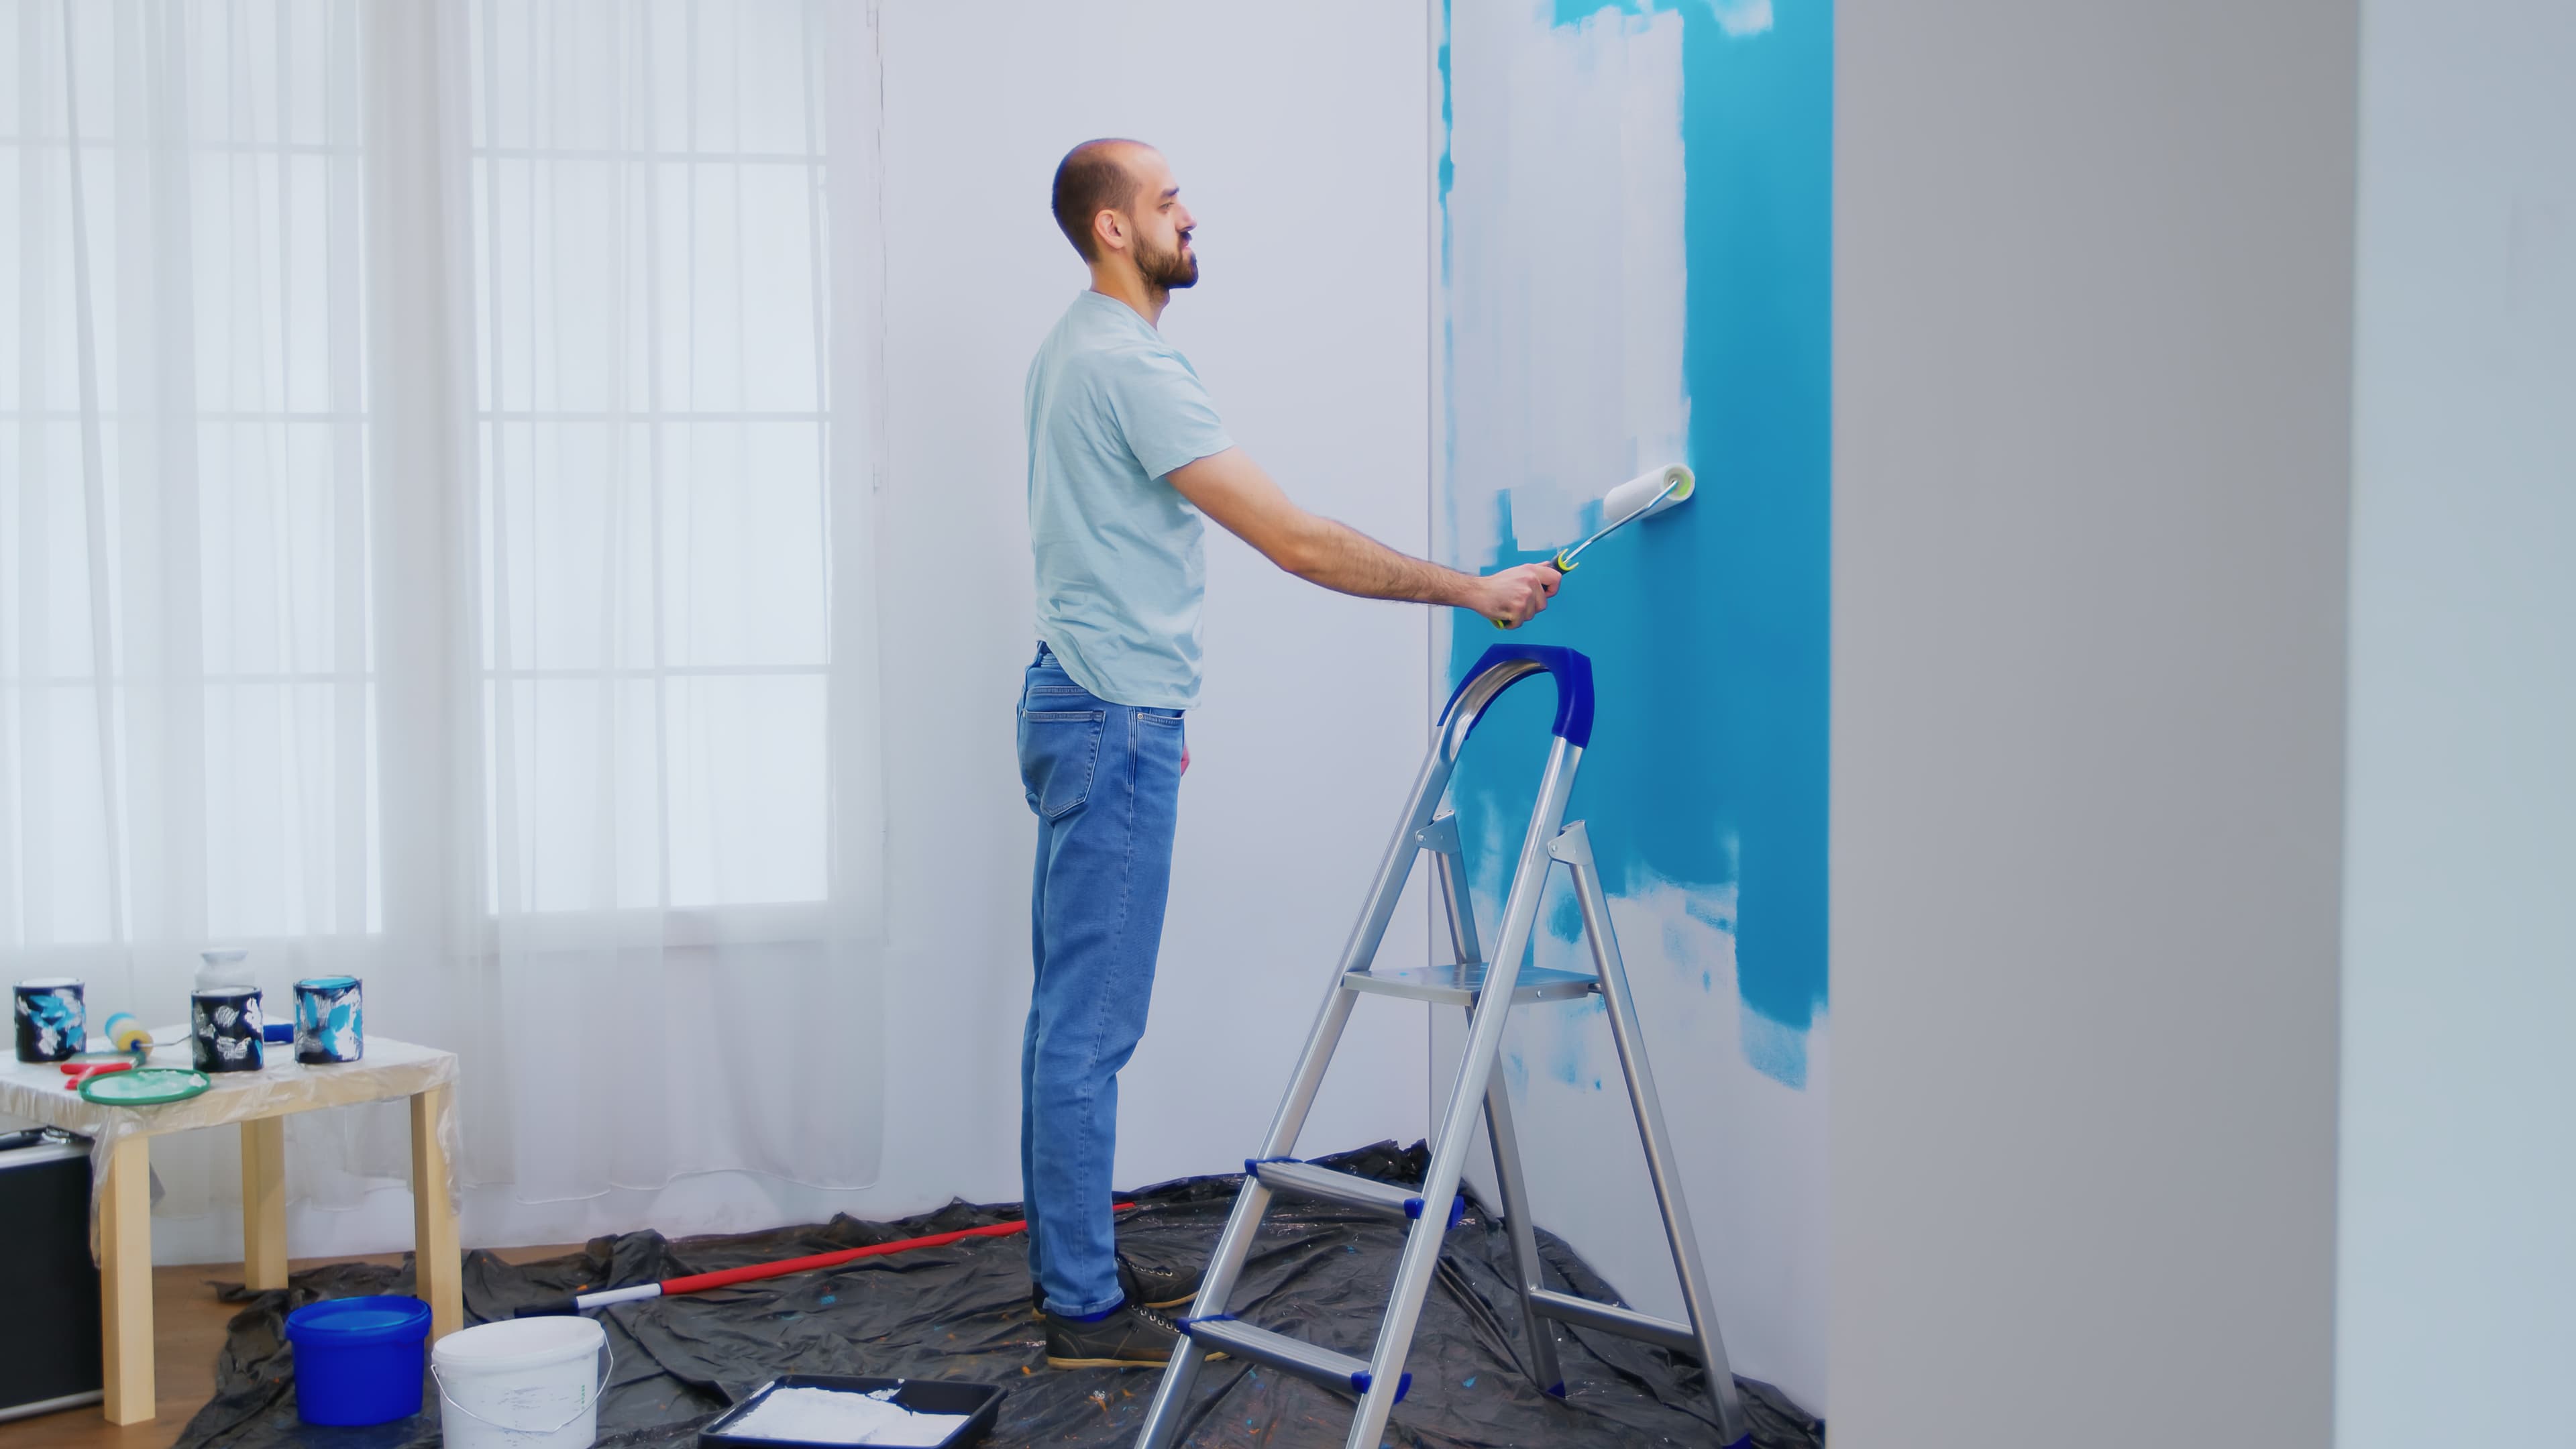
Are you planning to repaint your HDB flat but unsure about the budget? This comprehensive guide breaks down the **actual costs** for HDB painting in Singapore for 2026. ## How Much Does HDB Painting Cost in 2026? The cost of painting an HDB flat in Singapore typically ranges from **$400 to $1,800** depending on the flat type, paint quality, and additional services required. | Flat Type | Basic Package (1 Coat) | Standard Package (2 Coats) | Premium Package (2-3 Coats + Repairs) | |-----------|------------------------|----------------------------|---------------------------------------| | 3-Room HDB | $400 - $600 | $550 - $800 | $700 - $1,000 | | 4-Room HDB | $500 - $750 | $700 - $1,000 | $900 - $1,300 | | 5-Room HDB | $600 - $900 | $850 - $1,200 | $1,100 - $1,500 | | Executive Flat | $700 - $1,000 | $1,000 - $1,400 | $1,300 - $1,800 | ## What Factors Affect HDB Painting Cost? Several key factors influence the final price of your HDB painting project: - **Flat size and number of rooms** – Larger flats require more paint, time, and labour - **Paint quality and brand** – Premium brands like Nippon and Dulux cost more but offer better durability - **Surface condition** – Walls with cracks, mould, or peeling paint need extra preparation work - **Number of paint coats** – 2 coats provide better coverage and durability than 1 coat - **Additional services** – Anti-mould treatment, crack repair, and furniture moving add to the cost ## What's Included in a Professional HDB Painting Service? When you hire a professional painting contractor, here's what you should expect: - Full furniture protection with plastic sheets and masking tape - Wall inspection and defect identification - Crack filling and surface repair - Sanding and proper surface preparation - 2–3 coats of quality paint application - Anti-mould treatment for humid areas (premium packages) - Final touch-up and thorough site cleaning ## How to Save Money on HDB Painting? Here are practical tips to reduce your painting costs without compromising quality: - **Book during off-peak seasons** – Avoid year-end and pre-CNY periods when prices are higher - **Prepare the space yourself** – Move small furniture and remove wall decorations before painters arrive - **Choose standard colours** – Custom colour mixing may incur additional charges - **Combine with neighbours** – Some contractors offer discounts for multiple units in the same block - **Request for package deals** – Ask for bundled services like painting + minor repair packages ## Is It Cheaper to DIY HDB Painting? While DIY painting might seem cost-effective, consider these hidden costs: - Paint, brushes, rollers, and masking tape ($150 - $300) - Ladder and drop cloths ($80 - $150) - Your time (2-4 days for an average flat) - Risk of uneven application and messy results - No warranty or after-service support Professional painters complete the job in **1-2 days** with guaranteed results and workmanship warranty. ## How to Get an Accurate HDB Painting Quote? To receive an accurate quote for your HDB painting project: 1. Prepare your flat details (room type, number of rooms) 2. Take photos of wall conditions (cracks, mould, stains) 3. Request site visits from 2-3 contractors for comparison 4. Ask for a **detailed breakdown** of costs (labour, materials, preparation) 5. Check if GST is included in the quoted price ## Final Thoughts: Is Professional HDB Painting Worth It? **Yes.** Professional HDB painting delivers: - **Flawless, streak-free finishes** that last 3-5 years - **Proper surface preparation** preventing future peeling and cracks - **Time savings** – professional teams work efficiently - **Clean, hassle-free experience** with furniture protection - **Warranty protection** for peace of mind 📞 **Ready to paint your HDB flat? Contact Reliable Paint SG for a free, no-obligation quote today!**
Finding the right painting contractor in Singapore can be overwhelming with hundreds of options available. This guide will help you identify **trustworthy, skilled professionals** who deliver quality results for your home or office. ## Why Choosing the Right Painting Contractor Matters A professional painting contractor does more than just apply paint to walls. They ensure: - Proper surface preparation for long-lasting results - Clean, streak-free finishes that look professional - Efficient project completion without unnecessary delays - Use of high-quality materials and proper techniques - Warranty and after-service support The wrong contractor can lead to peeling paint, messy workmanship, hidden costs, and endless frustration. ## 7 Key Factors to Consider When Choosing a Painting Contractor ## 1. Check Reviews and Testimonials Look for contractors with **consistent positive feedback** on platforms like Google Reviews, Facebook, and Trustpilot. Pay attention to comments about punctuality, cleanliness, and quality of work. ## 2. Verify Experience and Specialisation Ask how long they have been in business and what types of properties they specialise in (HDB, condo, landed, commercial). Experienced contractors handle challenges like mould, cracks, and uneven surfaces professionally. ## 3. Request Detailed Quotes A reliable contractor provides a **transparent quote** breaking down: - Labour costs - Paint materials and brand - Preparation work (sanding, crack repair, mould treatment) - Number of paint coats - GST and any additional fees ⚠️ **Red flag:** Contractors who give instant quotes without seeing your walls or asking about surface conditions. ## 4. Ask About Paint Brands Used Reputable contractors use **premium brands** like Nippon Paint, Dulux, or Jotun. Cheap, unbranded paint fades quickly and offers poor coverage. Ask if you can upgrade to premium paints for better durability. ## 5. Check for Insurance and Warranties Professional contractors should have: - **Public liability insurance** – covers accidents or property damage - **Workmanship warranty** – typically 6-12 months - **Mould resistance warranty** – for treated areas ## 6. Evaluate Communication and Professionalism How promptly do they respond to inquiries? Do they explain the process clearly? Professional contractors conduct **on-site assessments** before providing final quotes. ## 7. Compare Multiple Quotes Always get quotes from at least **3 different contractors** before deciding. But remember – the cheapest option often leads to poor results. Look for **value, not just price**. ## Questions to Ask Before Hiring a Painting Contractor - Can you provide recent references or photos of completed projects? - What surface preparation work is included in your quote? - How many coats of paint will you apply? - Do you move and protect furniture during painting? - What happens if I'm not satisfied with the final result? - Is the paint eco-friendly and low-odour? - How long will the project take from start to finish? ## Red Flags to Avoid ❌ Contractors demanding **full payment upfront** (10-30% deposit is standard) ❌ No physical address or legitimate business registration ❌ Vague quotes with hour-by-hour pricing ❌ No contract or written agreement ❌ Pressure tactics like "discount ends today" ❌ Poor online reviews or no online presence at all ## Why Homeowners Choose Reliable Paint SG As a trusted painting contractor in Singapore, we provide: ✅ **Transparent, fixed pricing** – no hidden surprises ✅ **Premium paint brands** (Nippon, Dulux) for lasting results ✅ **Detailed surface preparation** – sanding, crack repair, mould treatment ✅ **Clean, professional workmanship** with furniture protection ✅ **1-year workmanship warranty** for complete peace of mind ✅ **Free, no-obligation site visit** and consultation ## Final Checklist Before Hiring Before making your final decision, confirm these essentials: - Contractor has positive reviews and completed projects in your area - Detailed written quote provided before work starts - Workmanship warranty clearly stated in contract - Timeline and start date agreed in writing - Payment schedule defined (deposit + final payment) - Paint brand and number of coats specified 📞 **Looking for a reliable painting contractor in Singapore? Contact Reliable Paint SG for a free consultation and transparent quote today!**
Planning to refresh your condominium with a new coat of paint? This complete guide covers **everything you need to know** about condo painting in Singapore – from costs and process to tips for hiring the right professionals. ## How Much Does Condo Painting Cost in Singapore? Condo painting prices typically range from **$600 to $2,500+** depending on the unit size, paint quality, and additional services required. | Condo Type | Basic Package (1 Coat) | Standard Package (2 Coats) | Premium Package (2-3 Coats + Repairs) | |------------|------------------------|----------------------------|---------------------------------------| | 1-Bedroom (400-500 sqft) | $500 - $700 | $700 - $950 | $900 - $1,200 | | 2-Bedroom (600-800 sqft) | $650 - $900 | $900 - $1,200 | $1,200 - $1,600 | | 3-Bedroom (900-1,100 sqft) | $800 - $1,100 | $1,100 - $1,500 | $1,500 - $2,000 | | Penthouse (1,500+ sqft) | $1,200 - $1,800 | $1,800 - $2,300 | $2,200 - $3,000+ | ## What's Included in Professional Condo Painting? A professional condo painting service typically includes: - **Comprehensive furniture protection** – plastic sheets, masking tape, floor coverings - **Wall inspection and preparation** – sanding, crack filling, smoothing uneven surfaces - **Primer application** – ensures better paint adhesion and coverage - **2-3 coats of premium paint** – using brands like Nippon or Dulux - **Detailed finishing** – painting of doors, frames, ceiling edges, and skirting - **Final cleanup** – thorough removal of dust, debris, and protective materials - **Quality inspection** – walkthrough with homeowner to ensure satisfaction ## The Condo Painting Process: Step by Step ## Step 1: Initial Consultation and Site Visit The contractor visits your condo to assess wall conditions, measure the area, and discuss colour preferences. They provide a **detailed written quote** with no hidden fees. ## Step 2: Colour Selection and Material Preparation Choose your paint colours with professional guidance. Many contractors offer **colour consultation services** to help you select modern, harmonious shades. ## Step 3: Furniture Protection and Room Preparation Professional teams cover all furniture, flooring, light fixtures, and switches with protective materials. They may also help move larger items when needed. ## Step 4: Surface Preparation This critical step includes: - Sanding rough surfaces - Filling cracks and holes - Treating mould and stains - Applying primer (if needed) ## Step 5: Paint Application Skilled painters apply **2-3 coats** of quality paint using brushes, rollers, and sprayers for smooth, even coverage. Each coat is allowed to dry properly before the next application. ## Step 6: Final Touch-ups and Cleanup After the paint dries, teams inspect for missed spots or uneven areas, perform touch-ups, and remove all protective materials. Your condo is left clean and ready to enjoy. ## Step 7: Final Walkthrough and Handover The project supervisor walks through with you to ensure **100% satisfaction** before final payment. ## Important Questions to Ask Before Hiring a Condo Painter - Do you have experience painting condos in this development? - What **mould treatment** solutions do you offer for humid areas? - Will you move and protect my furniture properly? - What **paint brands** do you use – can I upgrade? - How many painters will be assigned to my unit? - How long will the project take? - Do you provide a **workmanship warranty**? - Are your painters insured with public liability coverage? ## Condo Painting Tips for Homeowners ## Before Painting Day - Remove small items, wall decorations, and electronics from walls - Clear walkways and provide easy access to all rooms - Inform your neighbours about potential noise (if allowed by condo management) - Check with condo management about painting regulations and lift booking requirements ## During Painting - Keep children and pets away from painting areas - Allow painters to work without interruptions - Discuss any concerns immediately with the project supervisor ## After Painting - Allow proper drying time before moving furniture back - Wait 2-4 weeks before cleaning painted walls - Keep spare paint for future touch-ups ## How to Choose the Right Condo Painting Contractor Look for these qualities in a professional contractor: ✅ **Proven condo painting experience** – different from HDB or landed property painting ✅ **Transparent, fixed pricing** – no hourly rates or surprise fees ✅ **Use of premium paint brands** – Nippon, Dulux, Jotun ✅ **Proper insurance coverage** – protects you and your property ✅ **Workmanship warranty** – typically 6-12 months ✅ **Clean, professional team** – respectful of your home and belongings ✅ **Positive customer reviews** – check Google and social media ## Why Choose Reliable Paint SG for Your Condo? At Reliable Paint SG, we specialise in **premium condo painting services** with: 🎨 **Experienced condo specialists** – we understand condo layouts and requirements 🛡️ **Comprehensive surface preparation** – including mould treatment and crack repair 🏠 **Furniture protection** – full coverage for all belongings ⏱️ **Fast, efficient completion** – typically 1-3 days depending on unit size ✨ **Low-odour, eco-friendly paints** – safe for families and pets 📞 **Free site visit and consultation** – no obligation, just honest advice ## Final Thoughts Condo painting is a worthwhile investment that transforms your living space and protects your walls from Singapore's humid climate. By hiring a **professional, experienced contractor** like Reliable Paint SG, you ensure beautiful results that last for years. 📞 **Ready to transform your condo? Contact Reliable Paint SG today for a free, no-obligation quote!**
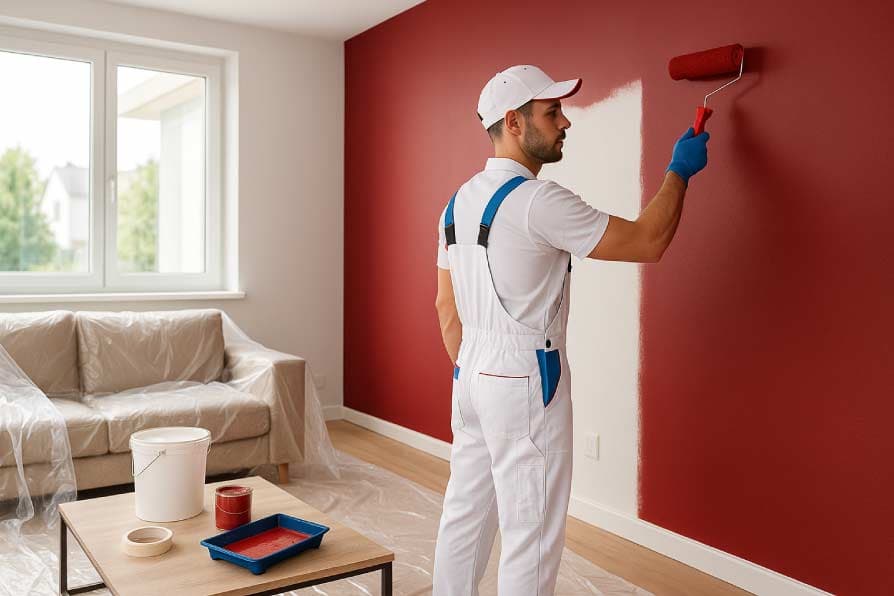
Painting your house is one of the most effective ways to refresh your home's appearance and increase its value. This **complete step-by-step guide** walks you through everything you need to know about house painting in Singapore. ## Why Paint Your House? Regular house painting offers several benefits: - **Enhances curb appeal** – a fresh exterior makes your home stand out - **Protects surfaces** – quality paint shields walls from moisture, mould, and UV damage - **Increases property value** – well-maintained homes sell faster and at better prices - **Improves indoor air quality** – modern low-VOC paints reduce harmful emissions - **Reflects your style** – updated colours modernize your living spaces ## Step 1: Assess Your Painting Needs Before hiring a contractor, determine: - **Interior or exterior painting?** – or both? - **Whole house or specific rooms?** – living room, bedrooms, kitchen, bathrooms? - **Current wall condition** – any cracks, mould, peeling paint, or water stains? - **Colour scheme** – staying with current colours or completely changing? - **Timeline** – when do you need the project completed? ## Step 2: Set a Realistic Budget House painting costs in Singapore vary based on several factors: | House Type | Basic Package | Standard Package | Premium Package | |------------|---------------|------------------|-----------------| | HDB 3-5 Room | $400 - $900 | $550 - $1,200 | $700 - $1,500 | | Condo (Full unit) | $600 - $1,200 | $900 - $1,800 | $1,200 - $2,500+ | | Terrace House | $1,200 - $2,000 | $1,800 - $3,000 | $2,500 - $4,500+ | | Semi-Detached | $1,800 - $3,000 | $2,500 - $4,500 | $3,500 - $6,000+ | | Bungalow | $3,000 - $5,000 | $4,500 - $7,000 | $6,000 - $10,000+ | **Additional costs to consider:** - Mould treatment ($100 - $300 per room) - Crack repair and plastering ($200 - $800) - Ceiling painting (adds 15-25% to total cost) - Premium paint upgrade ($200 - $500) ## Step 3: Choose the Right Paint ## Popular Paint Brands in Singapore - **Nippon Paint** – wide range, excellent coverage, anti-mould properties - **Dulux** – trusted brand, good durability, low odour options - **Jotun** – excellent for exterior weather protection ## Types of Paint Finishes - **Matt finish** – hides imperfections, ideal for ceilings and low-traffic areas - **Eggshell finish** – subtle sheen, easy to clean, good for living rooms and bedrooms - **Satin finish** – smooth, durable, perfect for hallways and kids' rooms - **Semi-gloss** – highly durable, moisture-resistant, ideal for kitchens and bathrooms ## Step 4: Find the Right Painting Contractor When searching for a house painter in Singapore, look for: ✅ **Valid business registration** – legitimate company with physical address ✅ **Positive reviews** – check Google, Facebook, and renovation forums ✅ **Portfolio of completed projects** – ask for before/after photos ✅ **Detailed written quotes** – transparent breakdown of all costs ✅ **Workmanship warranty** – minimum 6 months ✅ **Insurance coverage** – public liability protection ## Step 5: Prepare Your Home for Painting ## Before the painters arrive: - **Remove wall hangings** – pictures, mirrors, clocks, shelves - **Clear furniture** – move items away from walls or to the centre of rooms - **Cover valuable items** – electronics, artwork, delicate items - **Empty cabinets and wardrobes** if they will be painted - **Inform household members** about the schedule and areas being painted - **Arrange parking** for the painting team's vehicles ## Step 6: The Painting Process – What to Expect ## Day 1-2: Preparation and Primer - Professional contractors cover all furniture and floors with protective sheets - Walls are inspected, sanded, and cleaned - Cracks are filled and smoothed - Mould is treated with anti-fungal solutions - Primer is applied to ensure better paint adhesion ## Day 2-4: Paint Application - First coat of paint is applied - Paint is allowed to dry thoroughly (typically 4-6 hours) - Second coat is applied for even coverage - Third coat if specified in your package - Skirting boards, doors, and frames are painted ## Day 4-5: Touch-ups and Cleanup - Final inspection for missed spots - Touch-ups as needed - Removal of all protective materials - Thorough cleaning of the work area - Final walkthrough with homeowner ## Step 7: Post-Painting Care and Maintenance To keep your painted walls looking fresh: - **Allow proper drying** – wait 2-4 weeks before cleaning walls - **Use gentle cleaning methods** – soft cloth with mild soap and water - **Avoid abrasive cleaners** – they can damage paint finishes - **Touch up as needed** – keep leftover paint for future repairs - **Inspect annually** – check for signs of mould, cracks, or peeling ## How Often Should You Repaint Your House in Singapore? Due to Singapore's humid tropical climate, repainting is recommended: - **Every 3-5 years** for interior walls (with premium paint) - **Every 2-3 years** for high-traffic areas (hallways, kids' rooms) - **Every 3-4 years** for exterior walls exposed to sun and rain ## DIY vs Professional House Painting: Which is Better? | Factor | DIY Painting | Professional Painting | |--------|--------------|----------------------| | **Cost** | Lower upfront cost ($300-800 for materials) | Higher initial investment ($800-$5,000+) | | **Time** | 5-14 days of your weekends | 2-5 days with professional team | | **Quality** | Variable – depends on skill level | Consistent, professional finish | | **Preparation** | Time-consuming and labour-intensive | Done thoroughly by experts | | **Equipment** | Need to buy/rent ladders, rollers, sprayers | Professional-grade equipment included | | **Cleanup** | Your responsibility | Included in service | | **Warranty** | None | 6-12 months workmanship warranty | **Verdict:** For whole-house painting, professional service offers **better value, quality, and peace of mind**. ## Why Homeowners Trust Reliable Paint SG As an established house painting company in Singapore, we provide: 🏠 **Comprehensive house painting services** – interior and exterior 💯 **Transparent, fixed pricing** – no hidden fees or surprises 🛡️ **Premium paint brands** – Nippon, Dulux, Jotun ✨ **Detailed preparation work** – sanding, crack repair, mould treatment 🧼 **Clean, professional workmanship** – with full furniture protection 📞 **Free consultation and quote** – no obligation, just honest advice ⭐ **1-year workmanship warranty** – complete satisfaction guaranteed ## Frequently Asked Questions **Q: How long does house painting take?** A: Typically 2-5 days depending on house size and condition. HDB flats take 1-2 days, landed properties take 3-7 days. **Q: Can I stay at home during painting?** A: Yes, but expect some noise and smell. Low-odour paints minimise discomfort. **Q: Do I need to move out during painting?** A: Not usually. Professional painters work around your schedule and keep areas clean daily. **Q: How much does house painting cost?** A: See the pricing table above – costs vary based on house type, paint quality, and additional services. ## Ready to Transform Your Home? Your home deserves a fresh, beautiful look that you'll love coming back to. Let Reliable Paint SG handle everything – from preparation to final cleanup. 📞 **Contact Reliable Paint SG today for a free, no-obligation site visit and quote!**

Your office environment directly impacts **employee productivity, client perceptions, and brand image**. A fresh, professional paint job can transform your workspace without breaking the bank. This guide covers everything you need to know about office painting in Singapore. ## Why Office Painting Matters A well-maintained office with fresh, modern colours offers multiple benefits: - **Boosts employee morale** – bright, clean spaces improve mood and productivity - **Impresses clients and visitors** – professional appearance builds trust and credibility - **Reinforces brand identity** – custom colours aligned with your brand create recognition - **Improves lighting and spaciousness** – lighter colours make spaces feel bigger and brighter - **Protects walls** – quality paint prevents stains, marks, and wear-and-tear ## Office Painting Costs in Singapore | Office Size | Basic Package | Standard Package | Premium Package | |-------------|---------------|------------------|-----------------| | Small (500-1,000 sqft) | $800 - $1,200 | $1,200 - $1,800 | $1,800 - $2,500 | | Medium (1,000-2,000 sqft) | $1,200 - $2,000 | $1,800 - $2,800 | $2,500 - $3,800 | | Large (2,000-5,000 sqft) | $2,000 - $3,500 | $3,000 - $5,000 | $4,500 - $7,000 | | Corporate (5,000+ sqft) | Custom quote | Custom quote | Custom quote | **Note:** Prices vary based on ceiling height, wall conditions, number of rooms/partitions, and paint brand selected. ## What Makes Office Painting Different from Residential Painting? Office painting requires special considerations: - **Minimal business disruption** – painting often scheduled after hours or weekends - **Large, open spaces** – requires efficient equipment (sprayers for speed) - **High-traffic durability** – paints must withstand daily use and cleaning - **Brand colour accuracy** – precise matching of corporate colours - **Safety compliance** – proper ventilation, low-odour paints, minimal obstruction ## Step-by-Step Office Painting Process ## Step 1: Initial Consultation and Site Assessment A professional contractor visits your office to: - Measure the total wall area - Assess current wall conditions (stains, cracks, marks) - Discuss colour preferences and brand requirements - Review your schedule and downtime constraints - Provide a **detailed, fixed-price quotation** ## Step 2: Choose Your Colour Scheme **For productive workspaces:** - **Blue** – enhances focus and productivity (ideal for deep work areas) - **Green** – reduces eye strain, calming effect (good for break rooms) - **Yellow** – stimulates creativity and energy (creative departments) **For professional image:** - **White/off-white** – clean, professional, makes spaces look larger - **Light grey** – modern, sophisticated, hides marks well - **Beige/warm neutrals** – welcoming, professional, versatile **For brand alignment:** - Match your logo colours for reception areas - Use accent walls in meeting rooms ## Step 3: Schedule Painting to Minimise Disruption Flexible scheduling options include: - **After-hours painting** (6 PM - midnight) – minimal impact on daily operations - **Weekend painting** – 2 full days for complete transformation - **Phased painting** – paint section by section while office remains operational - **Public holiday painting** – long weekends for larger projects ## Step 4: Preparation and Protection Professional teams prepare your office by: - Moving furniture away from walls or to the centre of rooms - Covering desks, computers, and equipment with protective sheets - Masking light switches, power points, aircon vents, and window frames - Laying floor protection to prevent paint drips - Setting up proper ventilation for low-odour paints ## Step 5: Professional Paint Application The painting process includes: - **Surface preparation** – sanding rough areas, filling holes and cracks - **Primer application** – ensures even coverage and better adhesion - **2-3 coats of premium paint** – using rollers and sprayers for efficiency - **Edge and trim painting** – doors, frames, skirting boards - **Quality inspection** – checking for missed spots or uneven coverage ## Step 6: Cleanup and Handover After painting completion: - All protective materials removed - Furniture moved back to original positions - Thorough cleaning of work areas - Final walkthrough with office manager - Touch-up paint provided for future maintenance ## Office Painting Tips for Business Owners ## Before Painting: - **Plan 2-4 weeks in advance** – schedule around business cycles - **Inform employees** – share schedule and any temporary arrangements - **Back up data** – cover or move servers and sensitive equipment - **Clear wall displays** – remove whiteboards, bulletin boards, artwork - **Test colours** – paint sample patches before committing ## During Painting: - **Restrict access** to painting zones for safety - **Provide clear pathways** for painting teams - **Communicate with project supervisor** daily for updates ## After Painting: - **Allow proper drying** – 24-48 hours before hanging items - **Clean gently** – soft cloth with mild soap only - **Schedule regular maintenance** – touch-ups every 6-12 months ## How to Choose the Right Office Painting Contractor Look for these essential qualities: ✅ **Commercial painting experience** – different from residential ✅ **Flexible scheduling options** – after-hours and weekend work ✅ **Low-odour, eco-friendly paints** – safe for occupied spaces ✅ **Proper insurance** – public liability coverage (minimum $1 million) ✅ **Workmanship warranty** – typically 6-12 months ✅ **Good communication** – regular updates and project management ✅ **Positive client testimonials** – ask for references from similar businesses ## Questions to Ask Before Hiring - How many commercial office projects have you completed? - Can you provide references from similar-sized offices? - What's your process for minimising business disruption? - Do you offer after-hours or weekend painting at standard rates? - What paint brands do you recommend for high-traffic office areas? - How do you protect computers, servers, and sensitive equipment? - What is your workmanship warranty period? - Are your painters insured? ## Why Businesses Choose Reliable Paint SG for Office Painting At Reliable Paint SG, we specialise in **professional office painting services** with: 🏢 **Commercial painting expertise** – we understand business needs and constraints ⏱️ **Flexible scheduling** – after-hours, weekends, and overnight work available 🎨 **Brand colour matching** – precise colour accuracy for corporate identity 🛡️ **Low-odour, eco-friendly paints** – safe for occupied workspaces 🧼 **Clean, efficient workmanship** – minimal disruption to daily operations 💯 **Transparent fixed pricing** – no hidden fees or hourly surprises 📞 **Free site visit and consultation** – detailed quote with timeline ## Case Study: Office Transformation Example **Client:** Mid-sized tech company (2,500 sqft office) **Challenge:** Dated, dull walls affecting employee morale and client impressions **Solution:** After-hours painting (6 PM - midnight over 4 days) **Results:** - Modern light grey and brand-accent blue colour scheme - Completed without any business downtime - Employee satisfaction increased by 40% in post-project survey - Positive client feedback on professional appearance ## Frequently Asked Questions **Q: How long does office painting take?** A: Small offices (1-2 days after-hours), medium offices (3-5 days), large offices (1-2 weeks). Weekend painting completes large areas in 2-3 full days. **Q: Can painting be done while employees work?** A: Yes, with proper scheduling and phased approaches. However, after-hours painting is recommended to avoid disruption. **Q: Are low-odour paints really odour-free?** A: Modern low-VOC and zero-VOC paints have minimal odour and are safe for occupied spaces. Some smell may be present but dissipates within 24-48 hours. **Q: How much does office painting cost in Singapore?** A: See pricing table above. Most small-medium offices cost $1,500 - $3,500 for professional painting. ## Ready to Upgrade Your Workspace? A professional office painting project is one of the most cost-effective ways to transform your workspace, boost employee morale, and impress clients. 📞 **Contact Reliable Paint SG today for a free, no-obligation site visit and quote!**
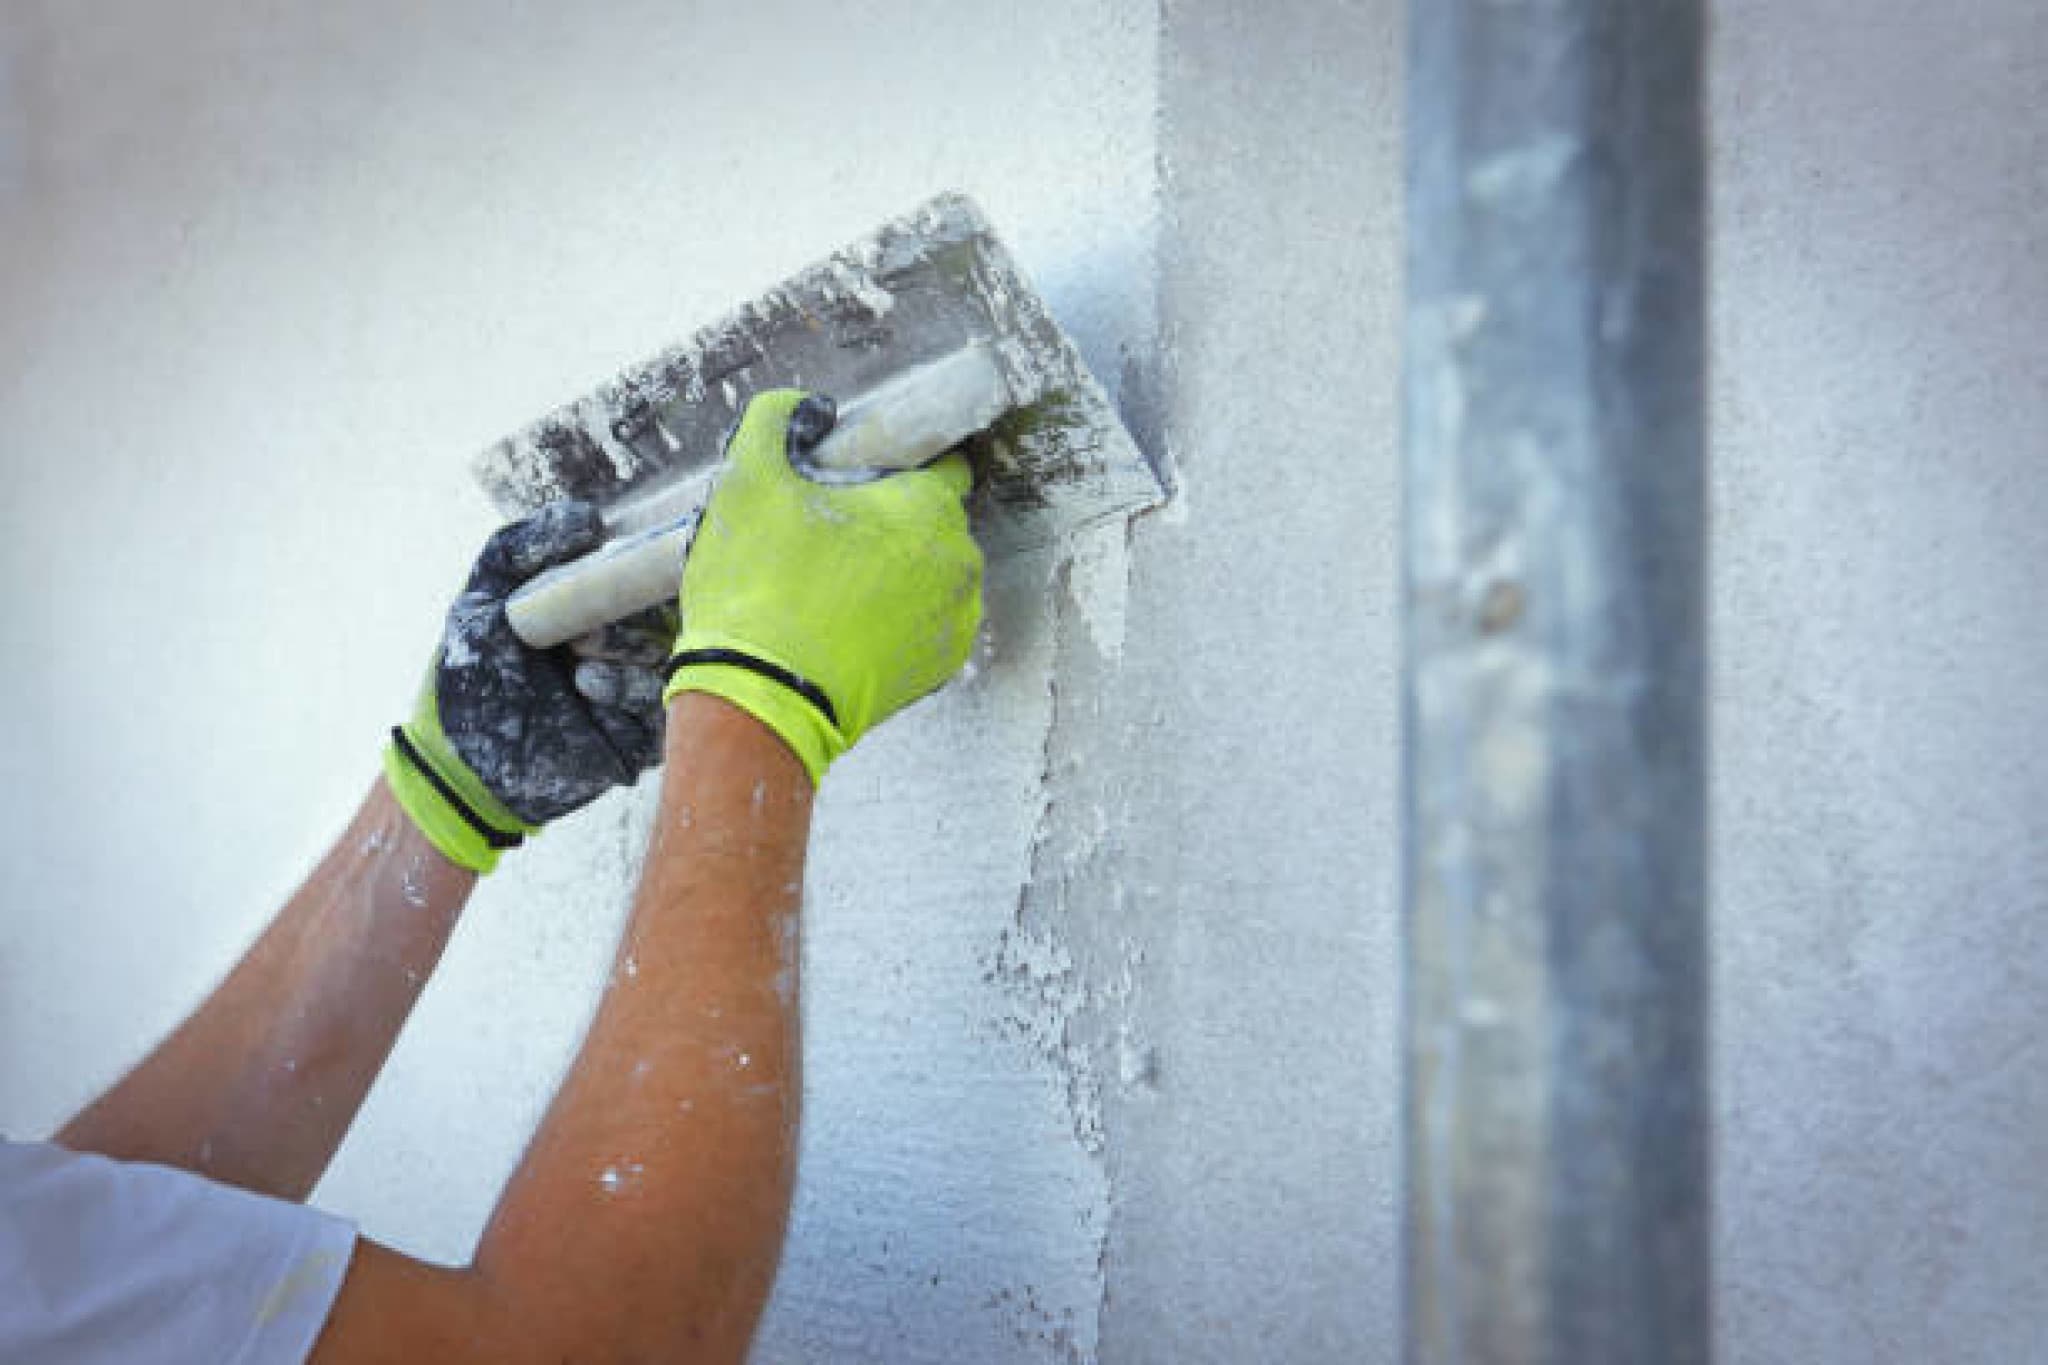
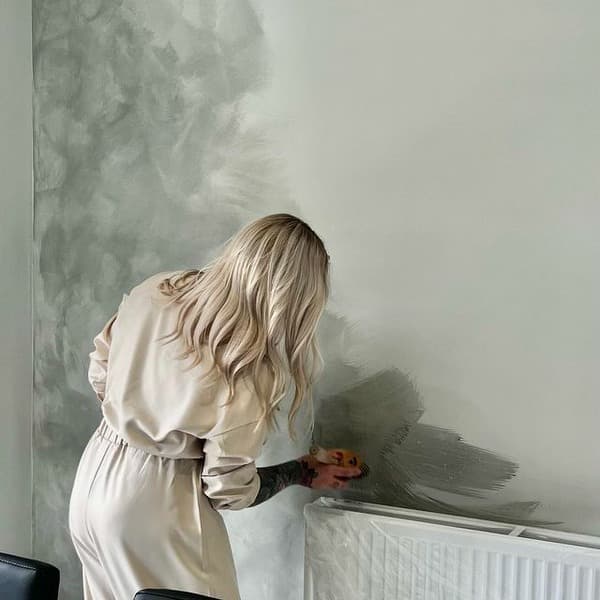
If you're planning to paint your home in Singapore, you've probably heard the terms "skim coat" and "plastering." While they sound similar, these are **different wall preparation techniques** with distinct purposes, costs, and results. This guide explains everything you need to know. ## Quick Overview: Skim Coat vs Plastering | Feature | Skim Coat | Plastering | |---------|-----------|------------| | **Purpose** | Smooth existing walls | Rebuild or level uneven walls | | **Thickness** | 2-5mm (thin layer) | 10-50mm+ (thick layer) | | **Best For** | Minor imperfections, texture smoothing | Severely damaged, uneven, or new walls | | **Drying Time** | 1-2 days | 3-7 days | | **Cost (per sqft)** | $2 - $5 | $5 - $12 | | **When Needed** | Before repainting old walls | Major renovation or new construction | ## What is Skim Coat? A **skim coat** is a thin layer (2-3mm) of joint compound or plaster applied over existing walls to create a smooth, uniform surface. Think of it as a **cosmetic treatment** that hides minor imperfections. ## When Do You Need a Skim Coat? ✔️ Existing walls with **minor cracks, pinholes, or bumps** ✔️ Walls with **uneven paint texture** from previous roller marks ✔️ **Orange peel or stippled textures** you want to smooth out ✔️ **Previously wallpapered walls** after wallpaper removal ✔️ Old walls with **minor water stain marks** ✔️ **Before repainting** to ensure perfect paint finish ## Skim Coat Process 1. **Surface cleaning** – remove dust, dirt, and loose paint 2. **Apply first thin layer** – using a trowel or roller 3. **Allow to dry** (4-6 hours) 4. **Light sanding** – smooth any ridges or imperfections 5. **Apply second layer** – for ultra-smooth finish 6. **Final sanding** – create perfectly smooth surface 7. **Primer application** – prepare for painting ## Skim Coat Advantages - **Cost-effective** – cheaper than full plastering - **Fast application** – 1-2 days for entire HDB flat - **Minimal dust and mess** – less disruptive than plastering - **Perfect for repainting projects** – creates ideal paint surface - **Preserves existing wall structure** – no major demolition ## Skim Coat Limitations - **Cannot fix severely uneven walls** – won't level major differences - **Limited thickness** – won't hide deep cracks or holes - **Requires skilled application** – poor skim coating looks worse than before ## What is Plastering? **Plastering** involves applying a thicker layer (10-50mm or more) of cement, gypsum, or lime plaster to **rebuild, level, or create new walls**. This is a **structural treatment** for significantly damaged or new walls. ## When Do You Need Plastering? ✔️ **Brand new walls** from renovation or construction ✔️ **Severely uneven walls** – visible bowing or sloping ✔️ **Deep cracks or holes** (more than 5mm deep) ✔️ **Water-damaged walls** with crumbling plaster ✔️ **Removing old tiles** leaving damaged wall surface ✔️ **Converting feature walls** – brick or concrete block walls needing finish ✔️ **Major renovation projects** where walls are being rebuilt ## Plastering Process 1. **Prepare the surface** – remove old, loose plaster 2. **Apply bonding agent** – helps plaster adhere 3. **Apply base coat** – thick layer (10-20mm) to build up surface 4. **Allow to dry** (24-48 hours) 5. **Apply second coat (if needed)** – for additional thickness 6. **Float and level** – using straight edge to ensure flatness 7. **Apply finish coat** – thin layer for smooth surface 8. **Dry and cure** (3-7 days before painting) ## Plastering Advantages - **Fixes major wall problems** – levels severely uneven surfaces - **Creates new walls** – essential for renovation construction - **Long-lasting solution** – durable for decades - **Hides deep imperfections** – cracks, holes, water damage - **Improves insulation** – some plasters provide thermal benefits ## Plastering Limitations - **Expensive** – 2-3x more than skim coating - **Time-consuming** – 5-14 days including drying time - **Messy and dusty** – significant disruption to your home - **Requires professional expertise** – not a DIY project - **Thicker walls** – reduces room dimensions slightly ## How to Decide Which One You Need ## Decision Flowchart **Step 1:** Are your walls structurally sound with no major damage? - **Yes** → Go to Step 2 - **No** → You need **plastering** **Step 2:** Are walls mostly flat but have minor imperfections (small cracks, bumps, rough texture)? - **Yes** → You need **skim coating** - **No** → Go to Step 3 **Step 3:** Are walls visibly uneven, bowed, or have deep damage? - **Yes** → You need **plastering** - **No** → You might need both (spot plastering + skim coating) ## Visual Signs: What to Look For | Wall Condition | Solution | Estimated Cost (3-room HDB) | |----------------|----------|----------------------------| | Minor hairline cracks, rough texture | Skim coat only | $500 - $900 | | Many small holes from removed nails/screws | Skim coat with patch filling | $600 - $1,000 | | Uneven surface with 2-5mm differences | Skim coat (2-3 layers) | $700 - $1,200 | | Visible bowing or sloping (5-10mm) | Plastering (partial wall) | $1,200 - $2,000 | | Water damage, crumbling areas | Plastering (affected areas) | $1,500 - $3,000 | | Completely damaged or new walls | Full plastering | $2,500 - $5,000 | ## Can You Do Both? **Yes!** Many renovation projects use both techniques: 1. **Major uneven areas** are fixed with plastering 2. **The rest of the wall** gets a skim coat for smooth finish 3. **Result:** Perfectly flat walls ready for premium paint This combination is common for older HDB flats and landed properties where settlement has caused unevenness over time. ## Cost Comparison in Singapore (2026) | Service | HDB 3-Room | HDB 4-Room | HDB 5-Room | Condo (1,000 sqft) | |---------|------------|------------|------------|-------------------| | **Skim coat only** | $500 - $900 | $700 - $1,200 | $900 - $1,500 | $1,200 - $2,000 | | **Plastering only** | $1,500 - $2,500 | $2,000 - $3,500 | $2,500 - $4,000 | $3,500 - $6,000 | | **Combined (plastering damaged areas + skim coat)** | $1,000 - $1,800 | $1,500 - $2,500 | $1,800 - $3,000 | $2,500 - $4,500 | ## Frequently Asked Questions **Q: Can I paint directly over old paint without skim coating?** A: Yes, if walls are in good condition. However, skim coating ensures a **flawless, smooth finish** that hides previous paint texture. **Q: How long does skim coat last?** A: With quality materials and proper painting, skim coat lasts **5-10 years** before needing reapplication. **Q: Is plastering necessary for new BTO flats?** A: Generally no – new BTO walls are already quite flat. However, some homeowners plaster to achieve **ultra-smooth, blemish-free finishes** before painting. **Q: Can I skim coat over old plaster?** A: Yes, if the old plaster is still sound and not crumbling. A professional contractor will inspect first. **Q: Which is better for hiding hairline cracks?** A: **Skim coat** – it's specifically designed to fill minor cracks and create a smooth surface. ## Why Choose Reliable Paint SG for Wall Preparation? At Reliable Paint SG, we provide **expert wall preparation services** including: 🔍 **Free wall inspection** – honest assessment of your wall condition 📋 **Detailed recommendation** – skim coat, plastering, or combination 💰 **Transparent pricing** – no hidden fees or unnecessary upselling 👷 **Skilled craftsmen** – experienced in both skim coating and plastering ⏱️ **Fast turnaround** – minimal disruption to your home ✨ **Perfect finish guaranteed** – smooth walls ready for premium paint ## Final Recommendation **Choose skim coating if:** Your walls are generally flat but have minor imperfections, and you want a smooth, professional finish before painting. **Choose plastering if:** Your walls are severely damaged, uneven, or new, requiring structural repair or complete rebuild. **Choose both if:** You have an older home with some damaged areas but most walls just need smoothing. Fix the major issues with plastering, then skim coat everything for uniform smoothness. 📞 **Not sure what your walls need? Contact Reliable Paint SG for a free on-site assessment and honest recommendation!**
Singapore's tropical climate – with its high humidity, intense sunlight, and frequent rain – takes a toll on painted walls. Unlike in temperate countries, paint in Singapore **degrades faster** due to these harsh environmental conditions. This guide explains how often you should repaint different areas of your home. ## General Repainting Timeline for Singapore Homes | Area | Recommended Frequency | Signs It's Time | |------|---------------------|-----------------| | **Living room** | Every 3-5 years | Faded colours, visible marks, dull appearance | | **Bedrooms** | Every 4-6 years | Scuffs near light switches, minor peeling | | **Kitchen** | Every 2-3 years | Grease stains, yellowing, difficult-to-clean surfaces | | **Bathroom** | Every 2-3 years | Mould growth, peeling near showers, water stains | | **Hallways & corridors** | Every 2-3 years | Heavy scuffing, handprint marks, high-traffic wear | | **Children's rooms** | Every 2-4 years | Crayon marks, stickers residue, general wear | | **Ceilings** | Every 5-7 years | Water stains, yellowing, cracks | | **Exterior walls** | Every 3-4 years | Fading from sun, mould growth, peeling paint | | **Doors & windows frames** | Every 3-5 years | Chipping, fading, exposed wood/metal | ## Why Singapore's Climate Speeds Up Paint Deterioration ## High Humidity (70-90% year-round) - Promotes **mould and mildew growth**, especially in kitchens and bathrooms - Prevents proper paint curing, leading to bubbling and peeling - Traps moisture behind paint layers, causing eventual failure ## Intense UV Exposure - **Fades colours** quickly, especially on exterior walls and near windows - Breaks down paint binders, causing chalky, powdery surfaces - Dark colours fade faster than light colours ## Frequent Rain and Storms - **Exterior paint erosion** from rain impact - Water seepage into micro-cracks leads to bubbling - Acid rain accelerates paint degradation ## Air Conditioning Use - Constant temperature fluctuations cause **paint expansion and contraction** - Accelerates cracking, especially on ceiling and wall joints - Dry AC air can make paint brittle over time ## Detailed Repainting Guide by Area ## Living Room (Every 3-5 years) **Why:** Living rooms see daily use and are the focal point of your home. Walls accumulate dust, handprints, and scuff marks from furniture. **Signs you need repainting:** - Colours look dull or faded, especially near windows - Visible scuff marks that won't clean off - Cracks at corners or joints - Outdated colour scheme affecting home appeal **Pro tip:** Use high-quality **scrubbable paint** (eggshell or satin finish) for easier maintenance between repaints. ## Bedrooms (Every 4-6 years) **Why:** Bedrooms experience less traffic than living areas, so paint lasts longer. However, bedrooms near windows face UV damage. **Signs you need repainting:** - Fading on walls facing windows - Marks around light switches and door handles - Peeling near air conditioning units - Want to refresh colour scheme **Pro tip:** Consider **low-odour, zero-VOC paints** for bedrooms – safer for sleeping areas and better air quality. ## Kitchen (Every 2-3 years) **Why:** Kitchens face unique challenges: grease splatter, steam from cooking, heat, and moisture. Painted surfaces degrade fastest here. **Signs you need repainting:** - Yellowing near cooking areas - Grease stains that won't clean off - Peeling paint above stove or sink - Mould growth in corners **Pro tip:** Use **semi-gloss or high-gloss paint** in kitchens – these finishes resist grease and are easier to wipe clean. ## Bathroom (Every 2-3 years) **Why:** Constant high humidity, water splashes, and poor ventilation make bathrooms the most challenging space for paint. **Signs you need repainting:** - Visible black mould spots (even after cleaning) - Paint bubbling or peeling near showers/tubs - Water stains on ceilings - Damp patches on walls **Pro tip:** Use **anti-mould, moisture-resistant paint** specifically designed for bathrooms. Ensure proper ventilation during and after painting. ## Hallways and Corridors (Every 2-3 years) **Why:** These are the **highest-traffic areas** in any home. Constant contact with hands, shoulders, furniture, and vacuum cleaners wears paint quickly. **Signs you need repainting:** - Heavy scuffing at waist level - Handprint marks near light switches - Bumped corners with missing paint - Visible dirt accumulation that doesn't clean **Pro tip:** Apply **durable satin or semi-gloss finish** – easier to clean and more resistant to scuffs. ## Children's Rooms (Every 2-4 years) **Why:** Active children inevitably leave marks on walls – crayons, stickers, sticky fingers, and general play wear. **Signs you need repainting:** - Crayon or marker drawings - Removed stickers leaving residue - Scuff marks from toys and furniture - Growing child wants new room theme or colour **Pro tip:** Use **washable, stain-resistant paint** that allows cleaning without damaging finish. ## Ceilings (Every 5-7 years) **Why:** Ceilings don't experience physical contact, but face moisture issues, especially in bathrooms and kitchens. **Signs you need repainting:** - Yellowing or browning patches - Water stain rings (sign of leakage above) - Hairline cracks along joints - Mould spots in corners **Pro tip:** Use **ceiling-specific flat white paint** – hides imperfections and reflects light better for brighter rooms. ## Exterior Walls (Every 3-4 years) **Why:** Direct exposure to sun, rain, wind, and pollution means exterior paint weathers fastest. **Signs you need repainting:** - Faded colours (especially for landed properties) - Chalky powder on walls when touched - Peeling or bubbling paint - Visible mould or algae growth - Hairline cracks appearing **Pro tip:** Use **weather-resistant, elastomeric paint** for landed properties – flexible, bridges small cracks, and protects against moisture. ## Factors That Affect Repainting Frequency ## Paint Quality Matters | Paint Grade | Expected Lifespan | Cost Difference | |-------------|-------------------|-----------------| | Premium (Nippon/Dulux top range) | 5-7 years interior, 4-5 years exterior | +40-60% from standard | | Standard (Mid-range brands) | 3-5 years interior, 3-4 years exterior | Baseline | | Budget (Economy brands) | 1-3 years interior, 1-2 years exterior | -20-30% from standard | **Investment tip:** Premium paint costs more upfront but saves money long-term by doubling time between repaints. ## Number of Coats Applied - **1 coat only:** 1-2 years lifespan - **2 coats minimum:** 3-5 years lifespan - **3 coats with primer:** 5-8 years lifespan ## Surface Preparation Quality - **Poor preparation** (no sanding, no primer) – paint fails within months - **Basic preparation** – 2-3 years lifespan - **Professional preparation** (sanding, filling, cleaning, primer) – maximum lifespan ## Room Usage and Household Factors - **Singles/couples without children:** Add 1-2 years to recommendations - **Families with young children:** Reduce recommendations by 1-2 years - **Pet owners:** Reduce by 1-2 years (scratches, fur oils, accidents) - **Smokers:** Reduce by 2-3 years (nicotine staining and odour) ## Signs It's Time to Repaint – Before It's Obvious Don't wait until paint is clearly failing. Watch for early warning signs: ## Visual Signs - **Chalking** – white powder on fingers when touching walls - **Fading** – uneven colour, especially near windows - **Cracking** – hairline cracks in spiderweb patterns - **Bubbling** – small blisters under paint surface - **Peeling** – paint starting to detach from walls ## Functional Signs - **Difficulty cleaning** – marks and stains won't wipe away - **Mould returning quickly** – even after cleaning - **Odour absorption** – walls holding cooking or smoke smells ## Maximising Paint Lifespan: Maintenance Tips ## Regular Cleaning - Wipe down walls lightly every 3-6 months with soft, slightly damp cloth - Address stains immediately – don't let them set - Use mild soap and water only (avoid harsh chemicals) ## Humidity Control - Use exhaust fans in bathrooms and kitchens - Run dehumidifiers in bedrooms (especially newer BTO flats) - Ensure proper ventilation throughout home ## Immediate Repairs - Fix water leaks immediately (roof, pipes, aircon) - Touch up small chips or marks promptly - Re-caulk joints in bathrooms and kitchens annually ## Strategic Furniture Placement - Leave small gaps between furniture and walls for air circulation - Use felt pads on furniture that touches walls - Avoid leaning wet items against painted surfaces ## Cost-Benefit Analysis: Is Repainting Worth It? | Paint Quality | Cost (4-room HDB) | Lifespan | Annual Cost | |---------------|-------------------|----------|-------------| | Budget paint + DIY | $300 - $500 | 1-2 years | $200-300/year | | Standard paint + professional | $800 - $1,200 | 3-4 years | $230-300/year | | Premium paint + professional | $1,300 - $1,800 | 5-7 years | $190-300/year | **Verdict:** Premium paint with professional application offers the **best long-term value** – similar annual cost but better appearance and less hassle. ## Why Choose Reliable Paint SG for Your Repainting Needs? At Reliable Paint SG, we help Singapore homeowners maintain beautiful, long-lasting walls with: 🎨 **Premium paint brands** – Nippon, Dulux, Jotun (5-7 year lifespan) 🛡️ **Professional surface preparation** – sanding, cleaning, priming 🦠 **Anti-mould treatment** – specially for Singapore's humid climate 💯 **2 coats minimum (often 3)** – maximum durability 🧼 **Clean workmanship** – no mess, minimal disruption 📞 **Free colour consultation** – modern colours that look fresher longer ## Frequently Asked Questions **Q: Can I just repaint one wall if others look fine?** A: Yes, but colour matching older paint is difficult. Consider repainting entire room for consistent finish. **Q: Does repainting my HDB flat increase its value?** A: Yes – fresh paint makes units look well-maintained and move-in ready, potentially increasing resale value by $5,000-15,000. **Q: How long after painting until I can move furniture back?** A: 24-48 hours for light use, 72 hours for heavy furniture placement (allows full paint curing). **Q: Is it cheaper to repaint more frequently with budget paint?** A: No – premium paint with professional application typically offers lower annual cost and much better appearance. ## Ready to Refresh Your Home? Don't wait until your walls look tired and worn. A fresh coat of quality paint transforms your home and protects it for years to come. 📞 **Contact Reliable Paint SG today for a free consultation and quote!**
Walk into any designer showflat, luxury condo, or high-end boutique in Singapore, and you might notice something different about the walls. They're not flat and uniform like standard paint. Instead, they have **depth, texture, and a soft, cloud-like appearance** that changes with the light. That's **lime wash** – and it's taking Singapore's luxury interior design scene by storm. ## What is Lime Wash Paint? Lime wash is a **natural, mineral-based wall finish** made from crushed limestone that's been fired, slaked with water, and aged. Unlike standard latex or acrylic paints that sit on top of walls, lime wash **bonds chemically** with the wall surface. ## How Lime Wash is Different from Standard Paint | Feature | Standard Paint | Lime Wash | |---------|---------------|-----------| | **Composition** | Acrylic/latex (plastic-based) | Natural limestone + water | | **Finish** | Flat, uniform, manufactured look | Soft, textured, organic appearance | | **Depth** | One-dimensional colour | Multi-dimensional with movement | | **Texture** | Smooth (or added texture separately) | Naturally creates matte, cloud-like texture | | **Breathability** | Seals walls (traps moisture) | Highly breathable (allows moisture escape) | | **Environmental impact** | Contains VOCs and chemicals | Natural, non-toxic, zero VOCs | | **Aging** | Fades, chips, peels | Ages beautifully (patina effect) | | **Cost per sqft** | $1 - $4 (paint only) | $8 - $20+ (including application) | ## Why Luxury Homes in Singapore Are Choosing Lime Wash ## 1. Unique, Handcrafted Appearance No two lime wash walls are identical. Each application creates **unique variations** in texture, colour depth, and pattern. This handcrafted, artisanal quality appeals to homeowners who want something beyond mass-produced finishes. ## 2. Soft, Cloud-Like Texture Lime wash creates a **velvety, matte finish** with subtle variations that feel organic and calming. Unlike flat paint that looks static, lime wash walls seem to **breathe and change** throughout the day as light moves across them. ## 3. Perfect for Singapore's Humid Climate **This is crucial for Singapore homes.** Standard paint seals walls, trapping moisture behind the surface – leading to mould, bubbling, and peeling. Lime wash is **highly breathable**, allowing moisture to escape naturally. This makes it: - **Mould-resistant** – moisture doesn't get trapped - **Self-healing** – minor cracks close naturally - **Long-lasting** – doesn't peel or bubble ## 4. Eco-Friendly and Healthy Lime wash contains **no VOCs (Volatile Organic Compounds)** , no chemicals, and no toxins. For homeowners concerned about: - **Air quality** – zero off-gassing - **Family health** – safe for children, elderly, and allergy sufferers - **Environmental impact** – natural, sustainable material ## 5. Timeless, Elegant Aesthetic Lime wash has been used for **thousands of years** – from ancient Roman villas to Mediterranean estates. Its timeless appeal works beautifully with: - **Modern minimalist** interiors (adds warmth and texture) - **Scandinavian design** (soft, muted tones) - **Organic modern** (natural, earthy feel) - **Wabi-sabi aesthetic** (celebrates imperfection and natural materials) ## Where Does Lime Wash Work Best in Singapore Homes? ## Feature Walls (Most Popular) A single lime wash accent wall creates dramatic impact without overwhelming the space: - **Behind the bed** in master bedrooms - **TV feature wall** in living rooms - **Dining area accent** for entertaining spaces ## Full Living Room Walls For a cohesive, luxurious look, some homeowners apply lime wash to entire living rooms. The soft texture creates a **calming, serene environment** perfect for relaxation. ## Bedroom Suites Lime wash in bedrooms creates a **hotel-like, spa atmosphere** – soft, quiet, and deeply restful. The natural, breathable finish also improves bedroom air quality. ## Home Offices and Libraries The matte, non-reflective finish reduces glare and eye strain, making lime wash ideal for workspaces. ## Boutique Spaces (Commercial) Cafes, restaurants, retail shops, and spas use lime wash to create **Instagram-worthy interiors** that stand out from competitors. ## Lime Wash Application Process – Why Expertise Matters Lime wash application is **nothing like standard painting**. It's a specialised, handcrafted process that requires training and experience. ## The Professional Lime Wash Process **Step 1: Surface Preparation** - Walls must be clean, dry, and properly primed - Existing paint may need removal (lime wash doesn't adhere well to acrylic paints) - Porous surfaces (new plaster, bare drywall) work best **Step 2: Base Colour Application** - A solid base colour is applied (shows through top layers for depth) **Step 3: Hand-Applied Lime Wash Layers** - Lime wash is applied by hand using brushes, trowels, or sponges - **2-4 thin layers** are built up for depth - Each layer is applied in irregular, cross-hatched patterns **Step 4: Texture Creation** - Skilled artisans create the signature **cloud-like, mottled effect** - Pressure, application direction, and dilution all affect final texture **Step 5: Sealing (Optional)** - Some lime wash finishes are left unsealed for maximum breathability - High-traffic areas may receive natural wax or soap sealant ## Why You Need Specialists ❌ **Standard painters cannot do lime wash** – it requires completely different skills ❌ **DIY lime wash kits** often look amateurish and uneven ✅ **Specialised lime wash artisans** ensure beautiful, professional results ## Lime Wash Costs in Singapore (2026) | Project Type | Size | Estimated Cost | |--------------|------|----------------| | **Single feature wall** | 50-100 sqft | $500 - $1,200 | | **Living room feature wall** | 100-200 sqft | $900 - $2,000 | | **Full bedroom** | 200-300 sqft | $1,800 - $3,500 | | **Full living room** | 300-500 sqft | $2,500 - $5,000 | | **Entire condo interior** | 800-1,200 sqft | $5,000 - $10,000 | | **Commercial boutique** | Per sqft | $12 - $25+ | **Note:** Premium lime wash colours, custom blends, and complex textures cost more. ## Popular Lime Wash Colours for Singapore Homes ## Warm Neutrals (Most Popular) - **Natural white** – pure, bright, clean - **Off-white / ivory** – warm, soft, inviting - **Warm grey** – sophisticated, modern - **Sand / beige** – earthy, calming ## Earth Tones - **Terracotta** – warm, Mediterranean feel - **Clay** – organic, grounded - **Ochre** – golden, warm glow ## Cool Tones (Modern Minimalist) - **Pale blue** – soft, airy, peaceful - **Mist grey** – cool, contemporary - **Sage green** – natural, restorative ## Deep Dramatic Colours - **Charcoal** – bold, sophisticated - **Deep navy** – dramatic, luxurious - **Forest green** – rich, enveloping ## Lime Wash vs Other Designer Finishes | Finish | Appearance | Cost (per sqft) | Durability | Best For | |--------|------------|-----------------|------------|----------| | **Lime wash** | Soft, textured, matte | $8 - $20+ | Very good with proper sealing | Feature walls, luxury interiors | | **Venetian plaster** | Polished, marble-like sheen | $15 - $35+ | Excellent | High-end luxury, formal spaces | | **Micro-cement** | Industrial, seamless, matte | $10 - $25+ | Excellent | Bathrooms, wet areas, modern design | | **Textured paint** | Sand-like, uniform texture | $3 - $8 | Good | Budget-friendly texture | | **Standard paint** | Flat, uniform | $2 - $5 | Good | Most residential applications | ## Lime Wash Maintenance and Care ## Daily Care - Dust gently with soft microfiber cloth - Avoid moisture and liquid contact when possible ## Stain Removal - **Minor marks:** Dry erase gently with soft eraser - **Stubborn stains:** Dab with damp cloth (no vigorous rubbing) ## Sealed vs Unsealed Lime Wash | Feature | Unsealed | Sealed (wax/soap) | |---------|----------|-------------------| | **Breathability** | Maximum | Reduced but still good | | **Stain resistance** | Low | Moderate | | **Water resistance** | Low | Moderate | | **Touch-up ease** | Very easy | Difficult | | **Appearance** | Pure matte, chalky | Slightly muted sheen | **Recommendation for Singapore homes:** Seal lime wash in kitchens, bathrooms, and children's areas. Leave unsealed in low-moisture areas like bedrooms and living rooms for maximum breathability. ## Is Lime Wash Right for Your Home? ## Lime wash is perfect if you: ✅ Want a **unique, handcrafted look** that isn't mass-produced ✅ Appreciate **natural, organic materials** with character ✅ Need **mould-resistant wall finish** for Singapore's humidity ✅ Care about **indoor air quality** and eco-friendly materials ✅ Have **budget for premium finishes** ($500+ per feature wall) ✅ Are working with **interior designer** or have clear design vision ## Lime wash may NOT be right if you: ❌ Expect **perfect, uniform** wall colour (it's intentionally varied) ❌ Need **scrubbable, high-durability** walls (use semi-gloss paint instead) ❌ Have **very tight budget** (premium finish costs more) ❌ Are selling home soon (future buyers may not appreciate) ## Why Choose Reliable Paint SG for Lime Wash? At Reliable Paint SG, we partner with **trained lime wash artisans** who specialise in: 🎨 **Authentic lime wash application** – handcrafted, not sprayed 🎨 **Colour consultation** – selecting perfect lime tones for your space 🎨 **Surface assessment** – ensuring walls are ready for lime wash 🎨 **Custom texture creation** – cloud, smooth, or patterned effects 🎨 **Sealing and protection** – for long-lasting beauty in Singapore's climate ## Frequently Asked Questions **Q: How long does lime wash last?** A: 10-15+ years with proper care. It ages beautifully, developing a rich patina over time. **Q: Can lime wash be applied over existing paint?** A: Not directly. Existing acrylic/ latex paint must be removed or specially primed before lime wash application. **Q: Is lime wash mould-proof?** A: Highly mould-resistant due to its alkalinity and breathability, but not 100% mould-proof in extreme conditions. **Q: Can I clean lime wash walls?** A: Yes – gentle dusting and occasional spot cleaning. Avoid harsh chemicals and scrubbing. **Q: Is lime wash more expensive than standard painting?** A: Yes – typically 3-5x more expensive per square foot due to premium materials and specialised labour. ## Transform Your Home with Timeless Elegance Lime wash isn't just paint – it's **art for your walls**. If you're looking for a finish that's unique, healthy, and perfect for Singapore's climate, lime wash deserves your consideration. 📞 **Contact Reliable Paint SG today for a lime wash consultation and quote!**
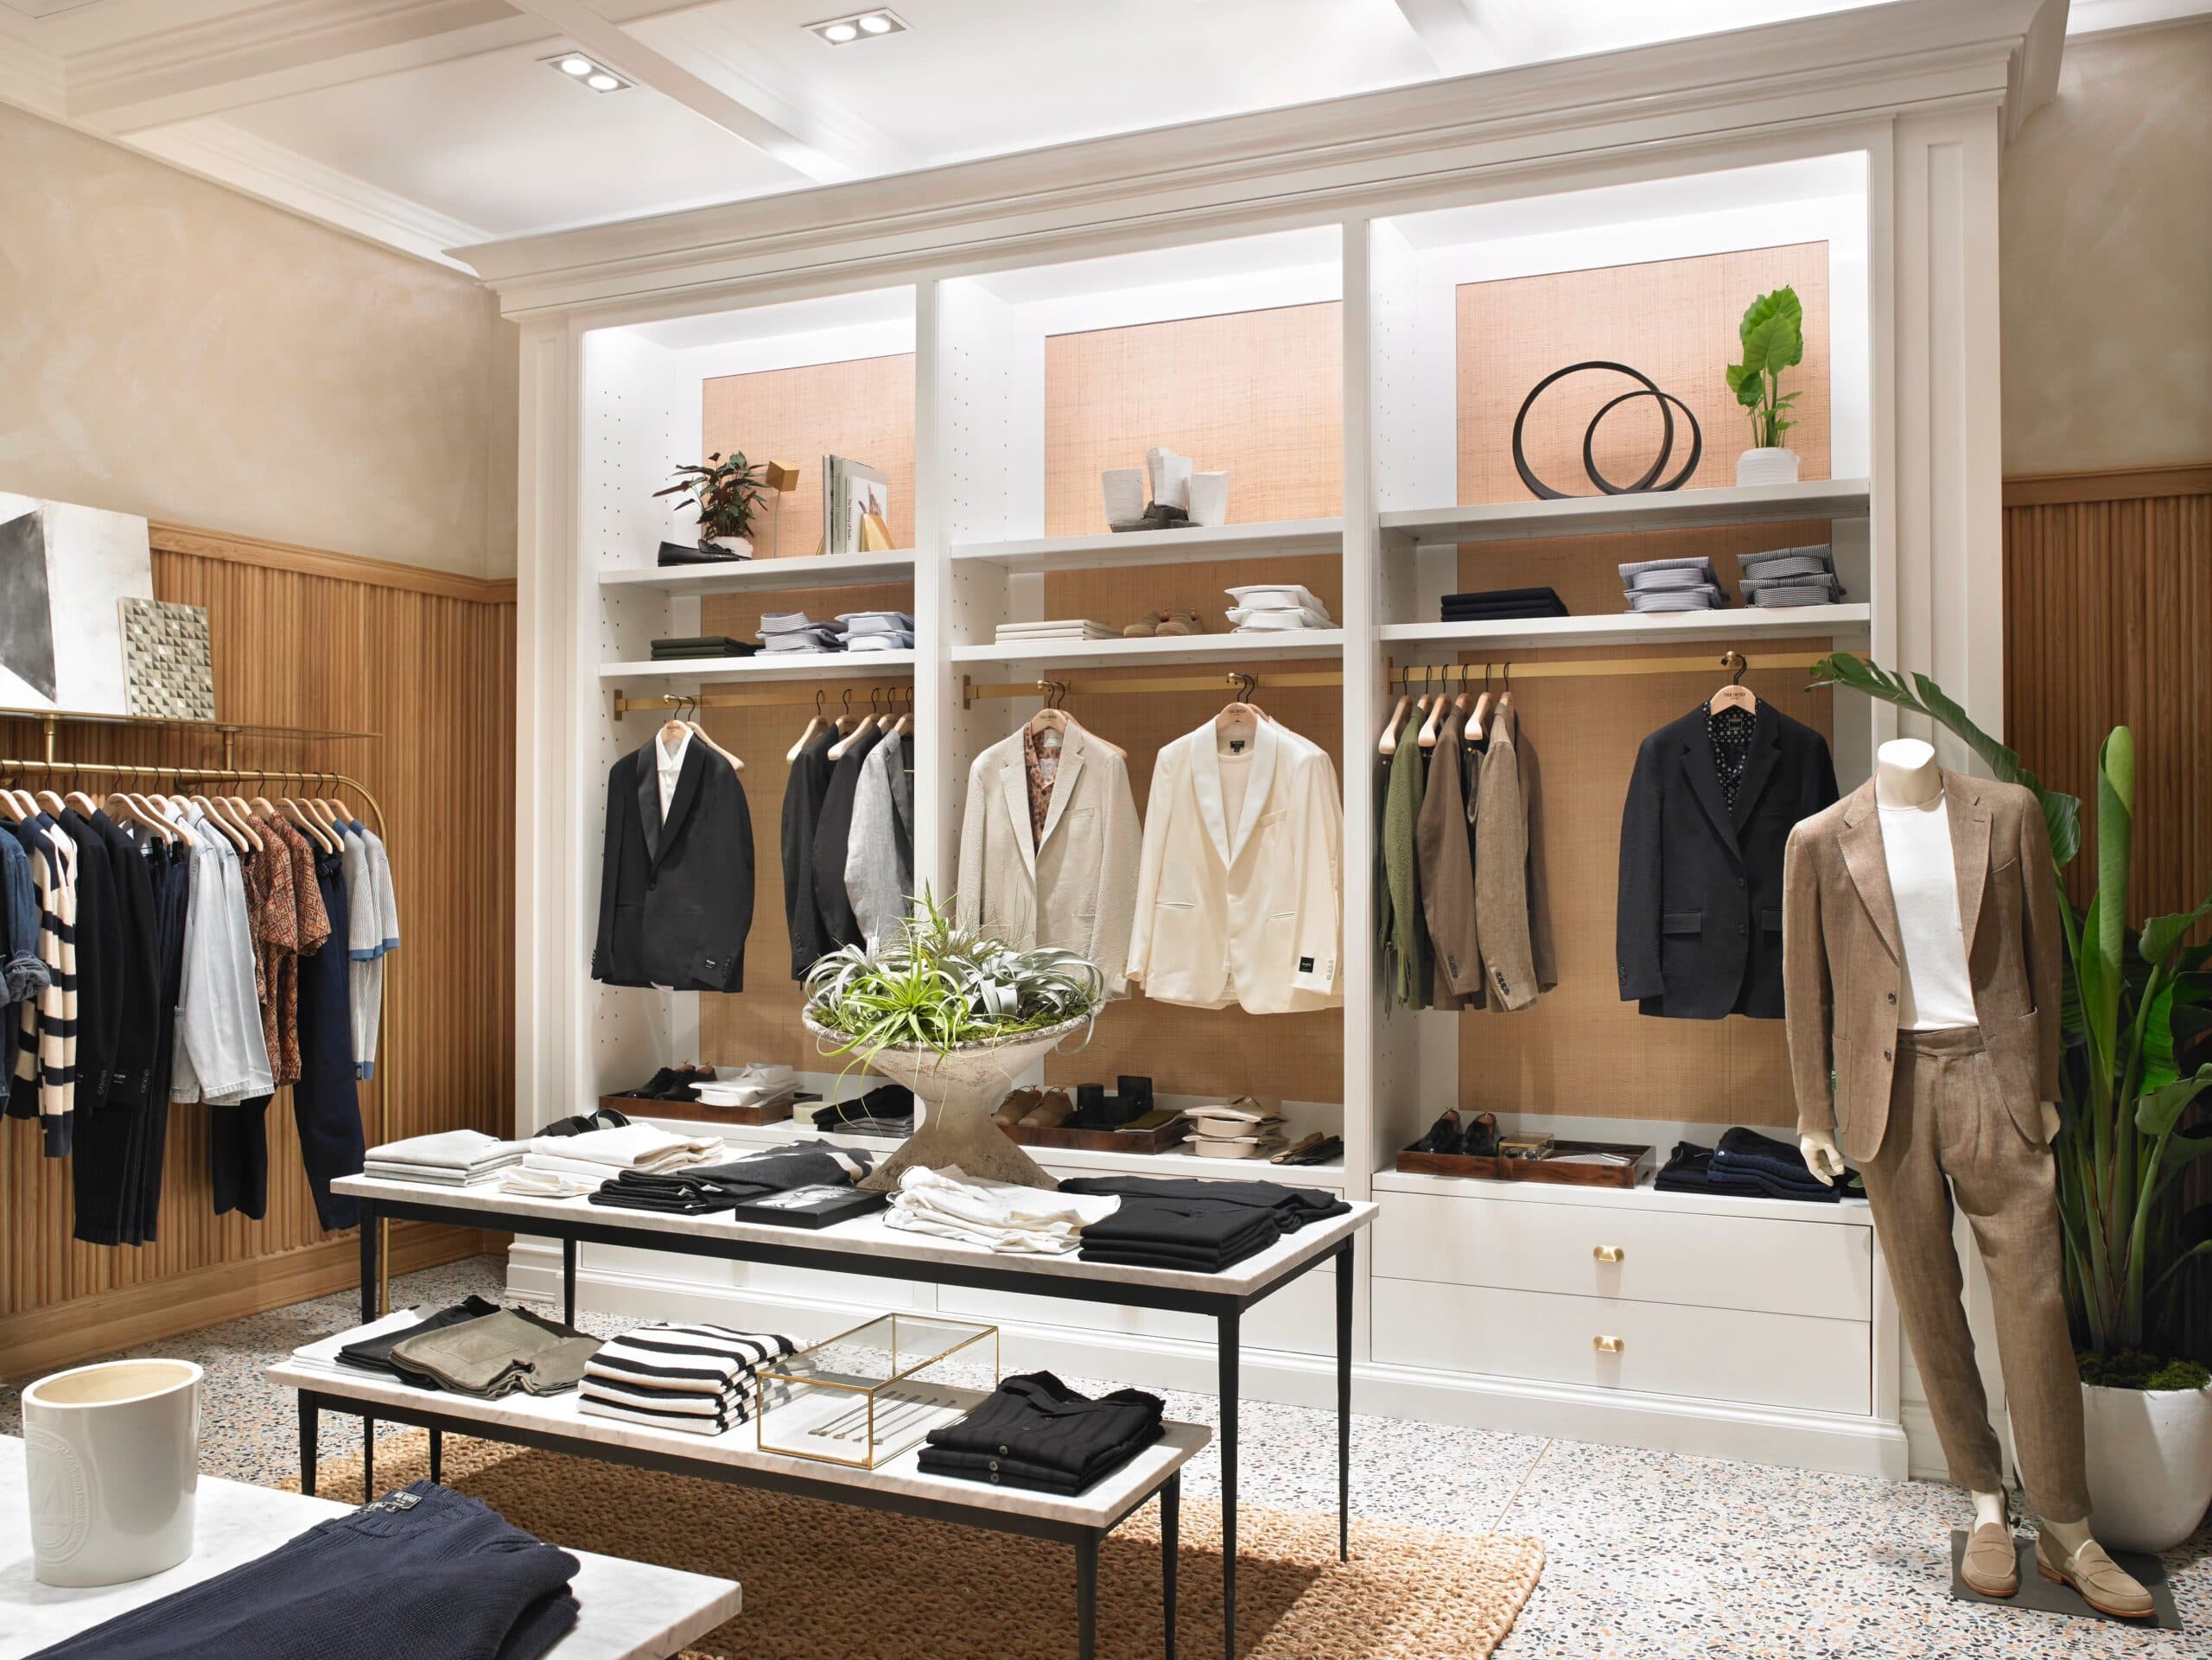
Walking past two shops – one with faded, dirty white walls and another with vibrant, inviting colours – which one would you enter? In retail, **first impressions matter within 7 seconds**. Your shop's wall colours directly impact whether customers walk in, browse longer, and make purchases. This guide reveals how retail shop owners in Singapore can use **colour psychology** and professional painting to boost foot traffic and sales. ## The Science: How Colour Affects Customer Behaviour Colour psychology research shows that: - **85% of consumers** cite colour as the primary reason for purchasing a product - **93% of shoppers** make buying decisions based on visual appearance - **Colour increases brand recognition** by up to 80% - **Proper lighting and colour** can increase sales by 10-30% Your shop's walls aren't just background – they're **silent salespeople** influencing every customer who walks past. ## Best Paint Colours for Retail Shops by Industry ## Food & Beverage (Cafes, Restaurants, Bakeries) | Colour | Psychological Effect | Best For | |--------|---------------------|----------| | **Red** | Stimulates appetite, creates urgency, increases energy | Fast food, bakeries (red accents) | | **Orange** | Encourages impulse buying, feels friendly and warm | Casual dining, juice bars | | **Yellow** | Grabs attention, feels happy and optimistic | Bakeries, dessert shops | | **Warm neutrals** (beige, cream) | Feels natural, comfortable, approachable | Fine dining, cafes | **Avoid:** Blue and purple (suppress appetite), pure white (feels clinical) ## Fashion & Apparel (Boutiques, Clothing Stores) | Colour | Psychological Effect | Best For | |--------|---------------------|----------| | **White / off-white** | Clean, luxurious, premium feel | High-end fashion, bridal, luxury brands | | **Black** | Sophisticated, powerful, exclusive | Premium menswear, luxury accessories | | **Soft pink / blush** | Feminine, gentle, welcoming | Women's fashion, lingerie, accessories | | **Navy blue** | Trustworthy, professional, calming | Corporate wear, premium casual | **Pro tip:** Use neutral walls (white, cream, light grey) to make clothing colours stand out. ## Beauty & Wellness (Salons, Spas, Clinics) | Colour | Psychological Effect | Best For | |--------|---------------------|----------| | **Soft green** | Calming, healing, natural | Spas, wellness centres, dermatology clinics | | **Lavender / light purple** | Relaxing, luxurious, creative | Beauty salons, massage studios | | **Warm beige / taupe** | Earthy, grounding, natural | Organic beauty, eco-friendly brands | | **Soft pink** | Nurturing, gentle, caring | Nail salons, children's beauty | **Avoid:** Bright red, orange, neon colours (creates anxiety, not relaxation) ## Electronics & Gadgets | Colour | Psychological Effect | Best For | |--------|---------------------|----------| | **Dark grey / charcoal** | Modern, high-tech, sophisticated | Premium electronics, gaming stores | | **Blue** | Trustworthy, reliable, intelligent | Computer shops, phone retailers | | **White** | Clean, modern, minimalist | Apple-style aesthetic, gadget accessories | ## Home & Furniture (Showrooms, Home Decor) | Colour | Psychological Effect | Best For | |--------|---------------------|----------| | **Warm white / cream** | Spacious, bright, welcoming | Furniture showrooms | | **Light grey** | Modern, versatile, sophisticated | Contemporary home decor | | **Soft beige / taupe** | Warm, comfortable, homely | Traditional furniture, home accessories | ## Colour Strategies by Shop Goal ## To Increase Foot Traffic (Attract Window Shoppers) Use **bright, warm colours** that pop from the street: - **Red** – creates urgency ("I must see what's inside") - **Yellow** – grabs attention from far away - **Orange** – feels friendly and approachable **Best for:** Retail shops on busy streets, mall kiosks, stores relying on walk-ins ## To Increase Average Transaction Value Use **premium, sophisticated colours**: - **Black + white** – creates luxury perception - **Navy + gold accents** – feels exclusive - **Deep grey** – signals quality **Best for:** High-end boutiques, jewellery stores, premium brands ## To Increase Browsing Time (Stay Longer) Use **calming, comfortable colours**: - **Blue** – relaxing, encourages exploration - **Green** – restful, reduces eye strain - **Warm neutrals** – feels like home **Best for:** Bookstores, home decor, gift shops, museums ## For Impulse Purchase Zones (Checkout Areas) Use **energetic, stimulating colours**: - **Red and yellow** – creates excitement, urgency - **Orange** – encourages quick decisions **Pro tip:** Paint the wall behind your cash wrap in an accent colour to draw attention to last-minute purchase items. ## Colour Mistakes That Hurt Retail Sales ## ❌ All-White Walls While white seems safe, all-white shops can feel: - **Cold and clinical** (like a hospital) - **Unfinished or cheap** (if lighting is poor) - **Boring and forgettable** **Fix:** Add one colourful accent wall or use warm off-whites instead of pure white. ## ❌ Too Many Bright Colours Rainbow-coloured walls overwhelm customers and: - Cause visual fatigue (customers leave faster) - Clash with products - Look unprofessional **Fix:** Use the **60-30-10 rule** – 60% dominant colour, 30% secondary, 10% accent. ## ❌ Trendy Colours That Dated Quickly That neon pink or deep purple that's trendy today will look outdated in 2 years, requiring expensive repainting. **Fix:** Use trendy colours as **accents only** (one wall, display areas). Keep main walls in timeless neutrals. ## ❌ Ignoring Your Brand Colours If your brand logo and packaging use specific colours, your shop walls should complement (not clash with) them. ## Professional Painting Tips for Retail Shops ## Consider Shop Lighting Colours look different under different lighting: | Lighting Type | Effect on Paint Colours | |---------------|-------------------------| | **Warm LED (2700-3000K)** | Makes warm colours richer, cool colours appear duller | | **Cool white (4000-5000K)** | Makes all colours appear brighter and sharper | | **Natural daylight** | Most accurate colour representation | **Pro tip:** Test paint samples under your actual shop lighting before committing. ## Use Zones and Wayfinding Use colour to guide customers through your shop: - **Entrance zone** – bright welcoming colour - **Main browsing area** – calming neutral - **Sale/discount zone** – red or orange (creates urgency) - **Premium product zone** – dark sophisticated colour - **Checkout area** – accent colour to draw attention ## Durability Matters in Retail Retail shops face **heavy traffic, constant touching, and regular cleaning**. Choose: - **Satin or eggshell finish** – easier to clean than flat/matte - **Semi-gloss** for high-touch areas (door frames, columns) - **Scrubbable, stain-resistant paint** – essential for retail ## Plan for Minimal Disruption For operating retail shops, schedule painting: - **Overnight** (after closing, before opening) - **During slow days** (Monday-Wednesday) - **Use low-odour paints** – no chemical smells affecting customers next day - **Phase painting** – paint section by section while shop remains open ## Real Retail Colour Success Stories ## Case Study 1: Bakery Increased Sales by 25% **Before:** Plain white walls, felt institutional and cold **After:** Warm yellow accent wall + terracotta details **Result:** Customers described shop as "warm and inviting" – sales increased 25% in 3 months ## Case Study 2: Fashion Boutique Doubled Premium Sales **Before:** Bright pink walls (distracted from clothing) **After:** Charcoal grey + white trim (clothing popped) **Result:** Premium item sales doubled – customers perceived higher quality ## Case Study 3: Electronics Store Reduced Bounce Rate **Before:** Harsh white walls (customers felt overwhelmed) **After:** Deep blue feature wall + grey elsewhere **Result:** Average browsing time increased from 4 to 9 minutes ## Retail Painting Costs in Singapore | Shop Size | Basic Package | Premium Package (with colour consultation) | |-----------|---------------|---------------------------------------------| | Small (200-400 sqft) | $800 - $1,200 | $1,200 - $2,000 | | Medium (400-800 sqft) | $1,200 - $2,000 | $1,800 - $3,000 | | Large (800-1,500 sqft) | $2,000 - $3,500 | $3,000 - $5,000 | | Showroom (1,500+ sqft) | $3,500 - $6,000 | $5,000 - $8,000+ | **Additional services:** - Colour psychology consultation – $200 - $500 - Sample painting for testing – $100 - $300 - Overnight / weekend work – add 20-30% ## Quick Colour Checklist Before Painting Before finalising colours, consider: - Does this colour attract my target customers? - Does it complement my products/branding? - Will it look good under my shop lighting

